One Sheet Wonder
One Sheet Wonder – Onstage 2026 Sketch!
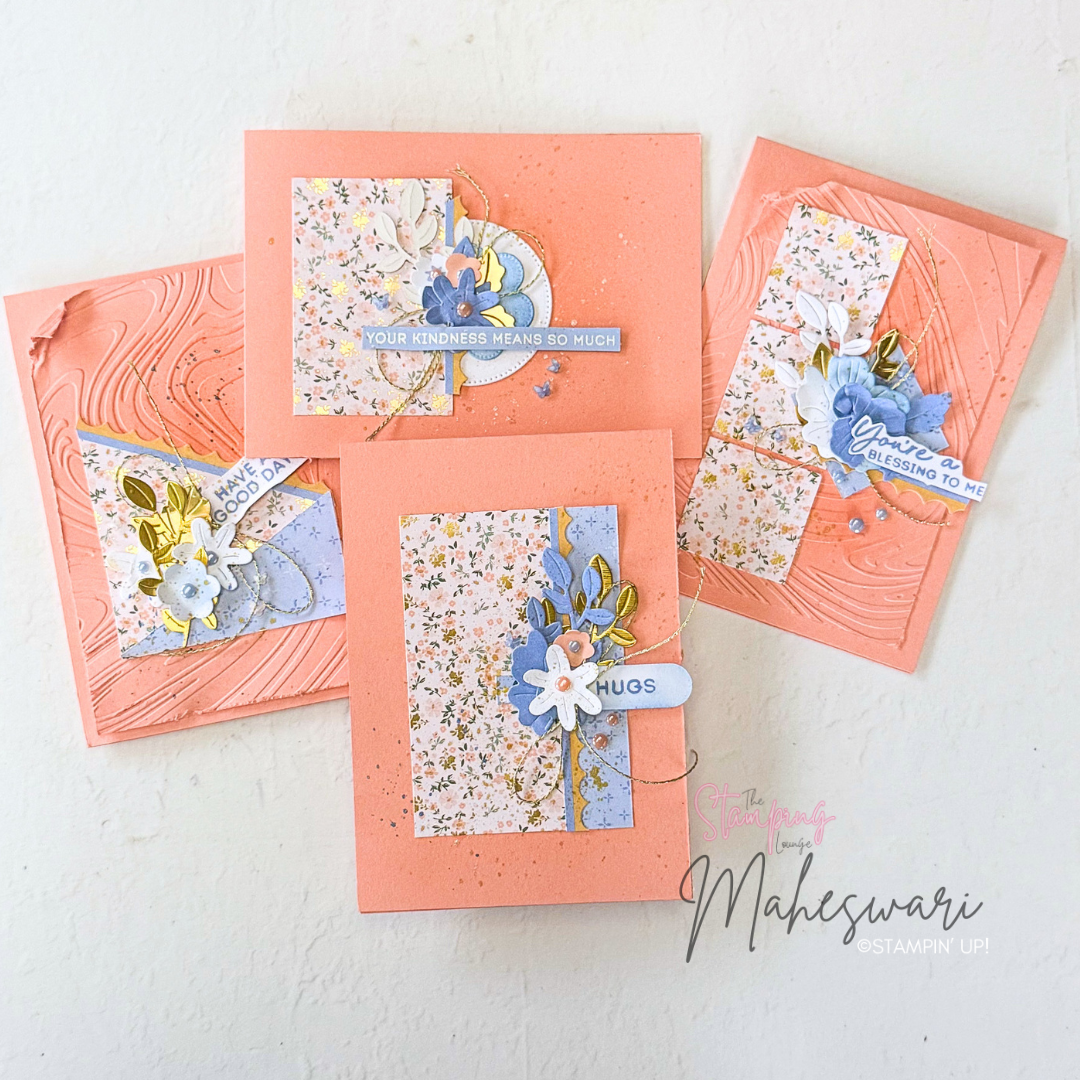
Today, I’m sharing a fun and easy One Sheet Wonder layout which was given to everyone on Onstage 2026 as 6″ x 6″ Sheets. I am a great fan of OSW and used the Bloom Boutique DSP to complete my projects and I am happy with it!
I used 2026-2028 New In-colours to complete this set of cards!
Stay tuned for project ideas using each piece!
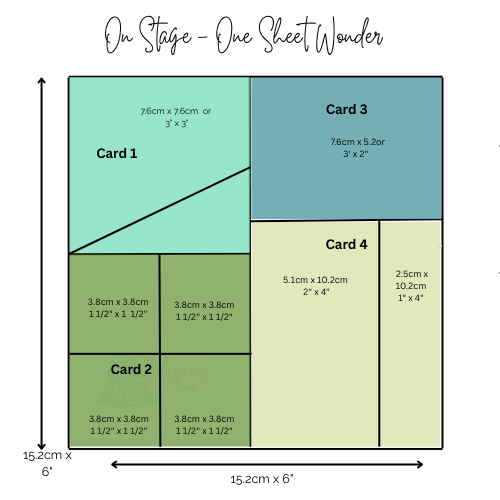
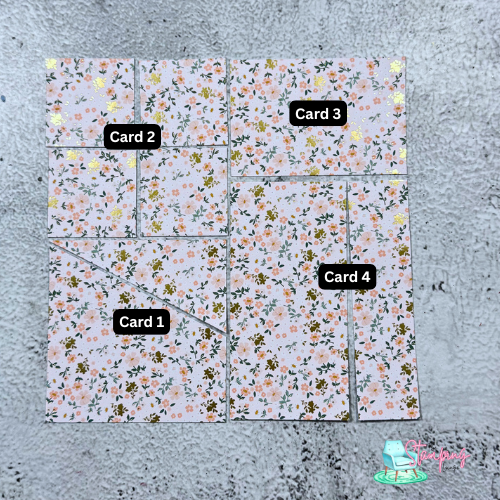
I created 4 cards using one 6″x6″ DSP.
I’ve added the cutting template to help you see exactly how to cut your DSP, making it super easy to follow along. Whether you’re crafting for yourself or making a thoughtful gift set, this technique is a real time-saver and brings out so much creativity.
Card 1:
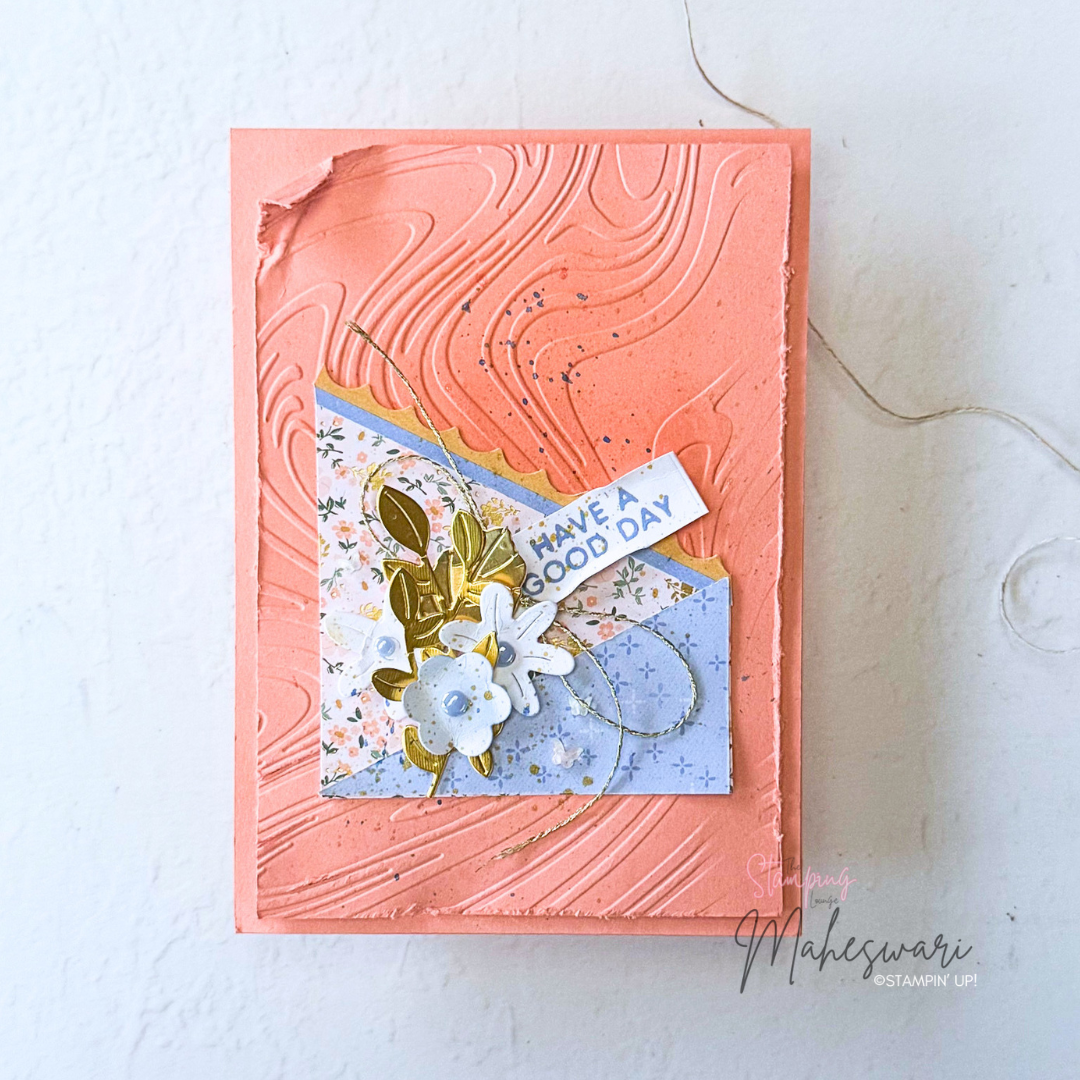
- Base card as Crisp Cantaloupe, embossed the Layer 1 using So Swiryl Embossing folder, attached to the base card using glue.
- Sponged little bit of Crisp Cantaloupe to the embossed card’s centre to get dark Shade.
- Add the DSP on the Layer 1 embossed piece using glue and flip the another piece of the DSP attached it together to the opposite end using glue.
- Stamp the sentiment using Hydrangea Hue
- Add the Gold Foil and die-cut Scallops circle in to small circles.
- Used some Old Gold Thread which I had long time ago.
- Add Basic White Inside with some Scrap pieces.
- Used negative side of the DSP stickers to add the colors.
- Finally Splatter some Wink Of Stella and Hygragea Hue Shimmer brush as an add on to the background. Finish it off using the Embellishments.
Card 2
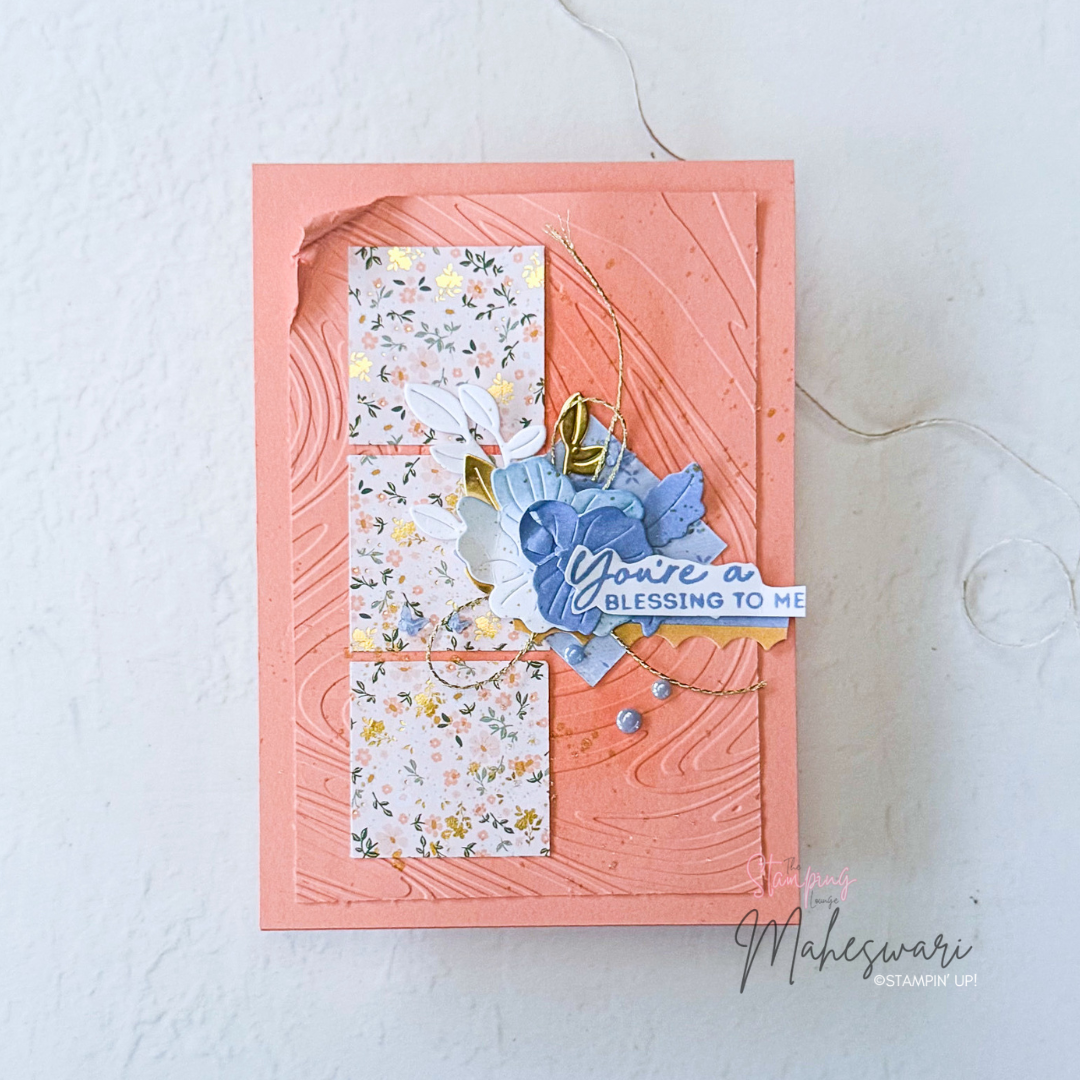
- Base card as Crisp Cantaloupe, embossed the Layer 1 using So Swiryl Embossing folder, attached to the base card using glue.
- Add the 3 DSP in one side and the next one flipped to show other colour and attach it together using glue.
- Stamp the sentiment using Hydrangea Hue.
- Used negative side of the DSP stickers to add the colors.
- Add the Gold Foil and die-cut Scallops circle in to small circles.
Card 3:
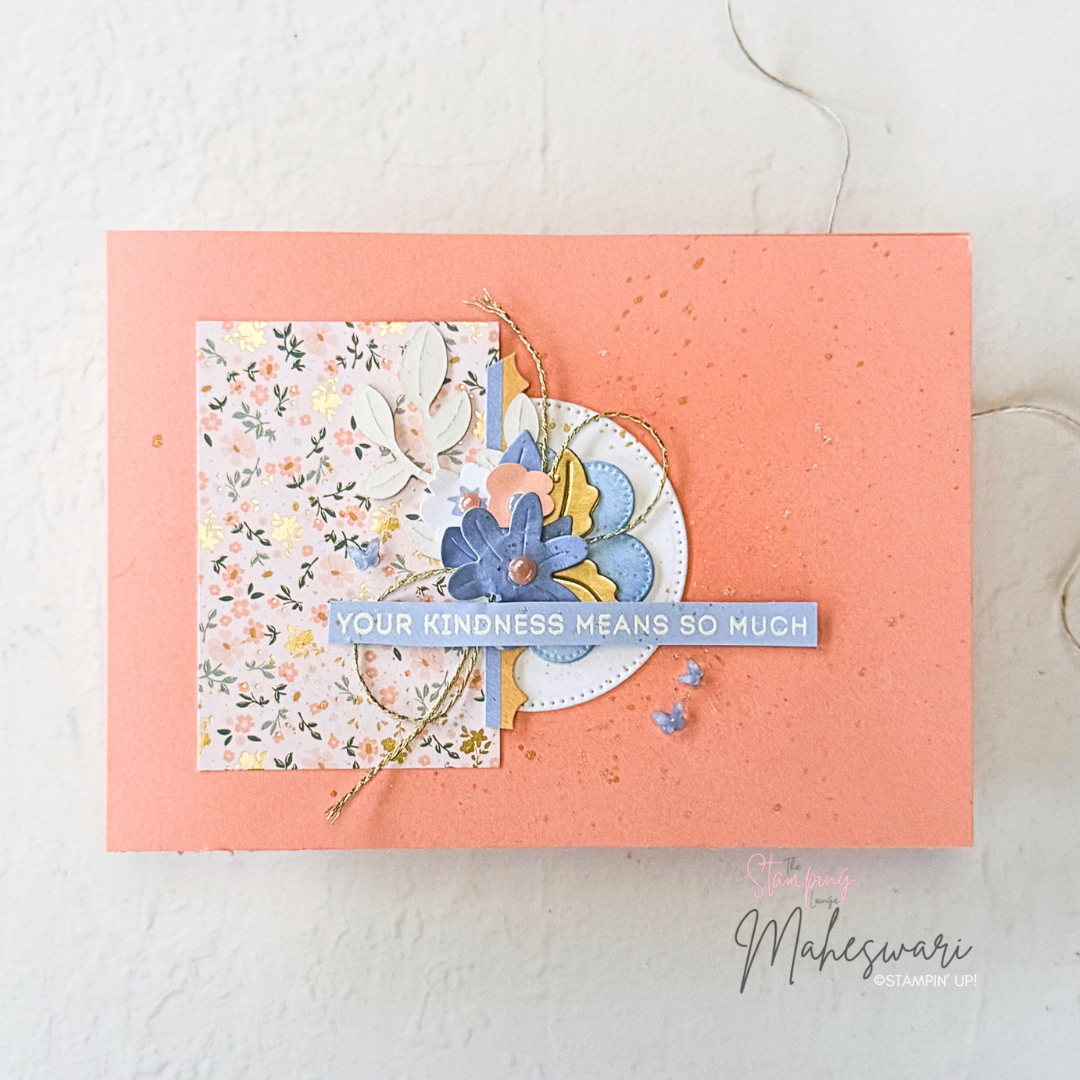
- Base card as Crisp Cantaloupe, add the DSP, sticker as a little border with the Stylish Shapes circle.
- Stamp the sentiment using Versamark ink pad and White embossing powder.
- Finally Splatter some Wink Of Stella and Mossy Meadow ink to the background. Finish it off using the Embellishments.
Card 4
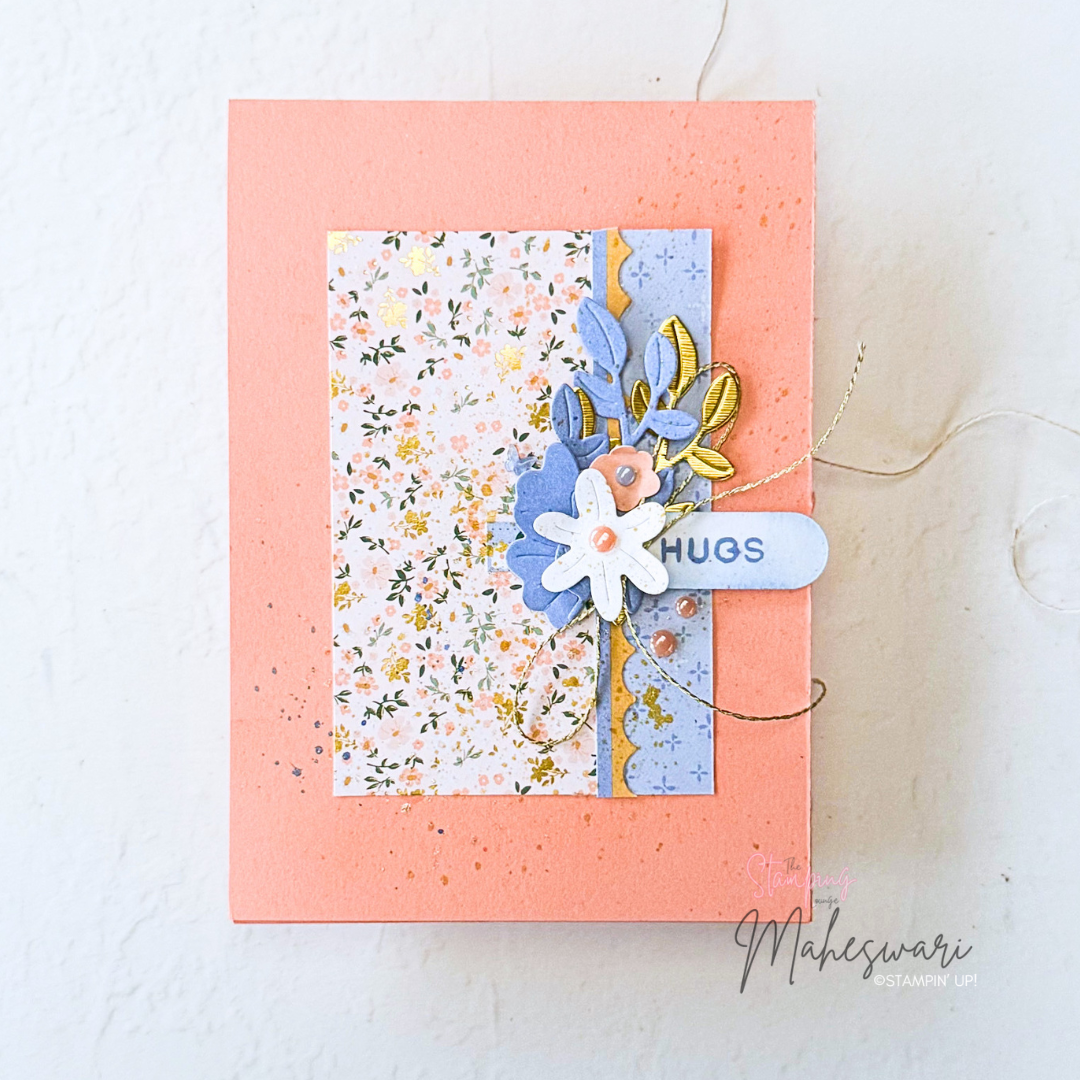
- Base card as Crisp Cantaloupe, add the Wider DSP first and the next small one close to each other with glue.add the sticker in the middle.
- Attach the double bow using glue dots.
- Stamp the sentiment using Hudragea ink pad and adhere it to the right side of the DSP, close to the bow.
- Splatter some Wink of Stella and in front of the card.
- Add Basic White Inside with some scrap pieces of DSP or stamped images you have.
Download the PDF below:
Tip: Bundle the finished cards with envelopes and tie them with a ribbon for a sweet, personal gift!
I’d love for you to give this a try! Let me know if you make your own version. I always enjoy seeing your beautiful creations.
Happy Crafting!
